
1-800-351-8234

In the middle of carving, I started to notice what looked like scratches in the wood. These white lines left by the knife are a sign that the blade has a tiny chip in it. Instead of being scratches, they’re lines of raised material, not cut to the same depth as the surface around it.
I try to keep a good edge on my sloyd knife through regular stropping. I use a 12" XL Leather Bench Mountable Strop with Green Honing compound. Pausing every now and then to strop ensures the edge is kept sharp. Stropping only removes the tiniest amount of material. To try and strop away a chip, even one as small as this, would take a very long time. Time to pull out the stones.
The chip in the knife-edge is less than a millimeter (1/25th of an inch) deep. The knife, a Morakniv 106, is laminated carbon steel with an HRC of about 61. As I mentioned above, stropping would take too long, but what grit is best to start with? Start too coarse and you’re removing more material than necessary. Too fine a grit, and you’ll be at it for ages.

Generally, getting rid of a chip means removing more steel than regular sharpening. My planned activity for the day was carving wood and not pitting steel against stone, so I opted to begin with my coarsest stone, the 500 grit. With smaller chips such as this, you can concentrate your sharpening efforts on the chip itself. To do this I still draw the whole edge along the stone, but I might make a couple extra passes on the damaged area or apply a little extra downward pressure when that area is in contact with the stone.
It’s easy to find where a chip is. You can take note of its location during carving. Sometimes they’re visible in how they reflect light at a different angle to the rest of the edge. I, however, like to live life dangerously. Carefully, with very little pressure, I tend to run the tip of my thumbnail down the edge. This method lets me feel where the chip is located. I’ve never cut myself doing this, but don’t try it if you think you might.
In my abrasive arsenal I have a selection of Shapton water stones going from 500 to 8000 grit. The 500 and 3000 are from the GlassStones HR Series, while the 1000, 5000 and 8000 are Kuromaku Professional Stones.

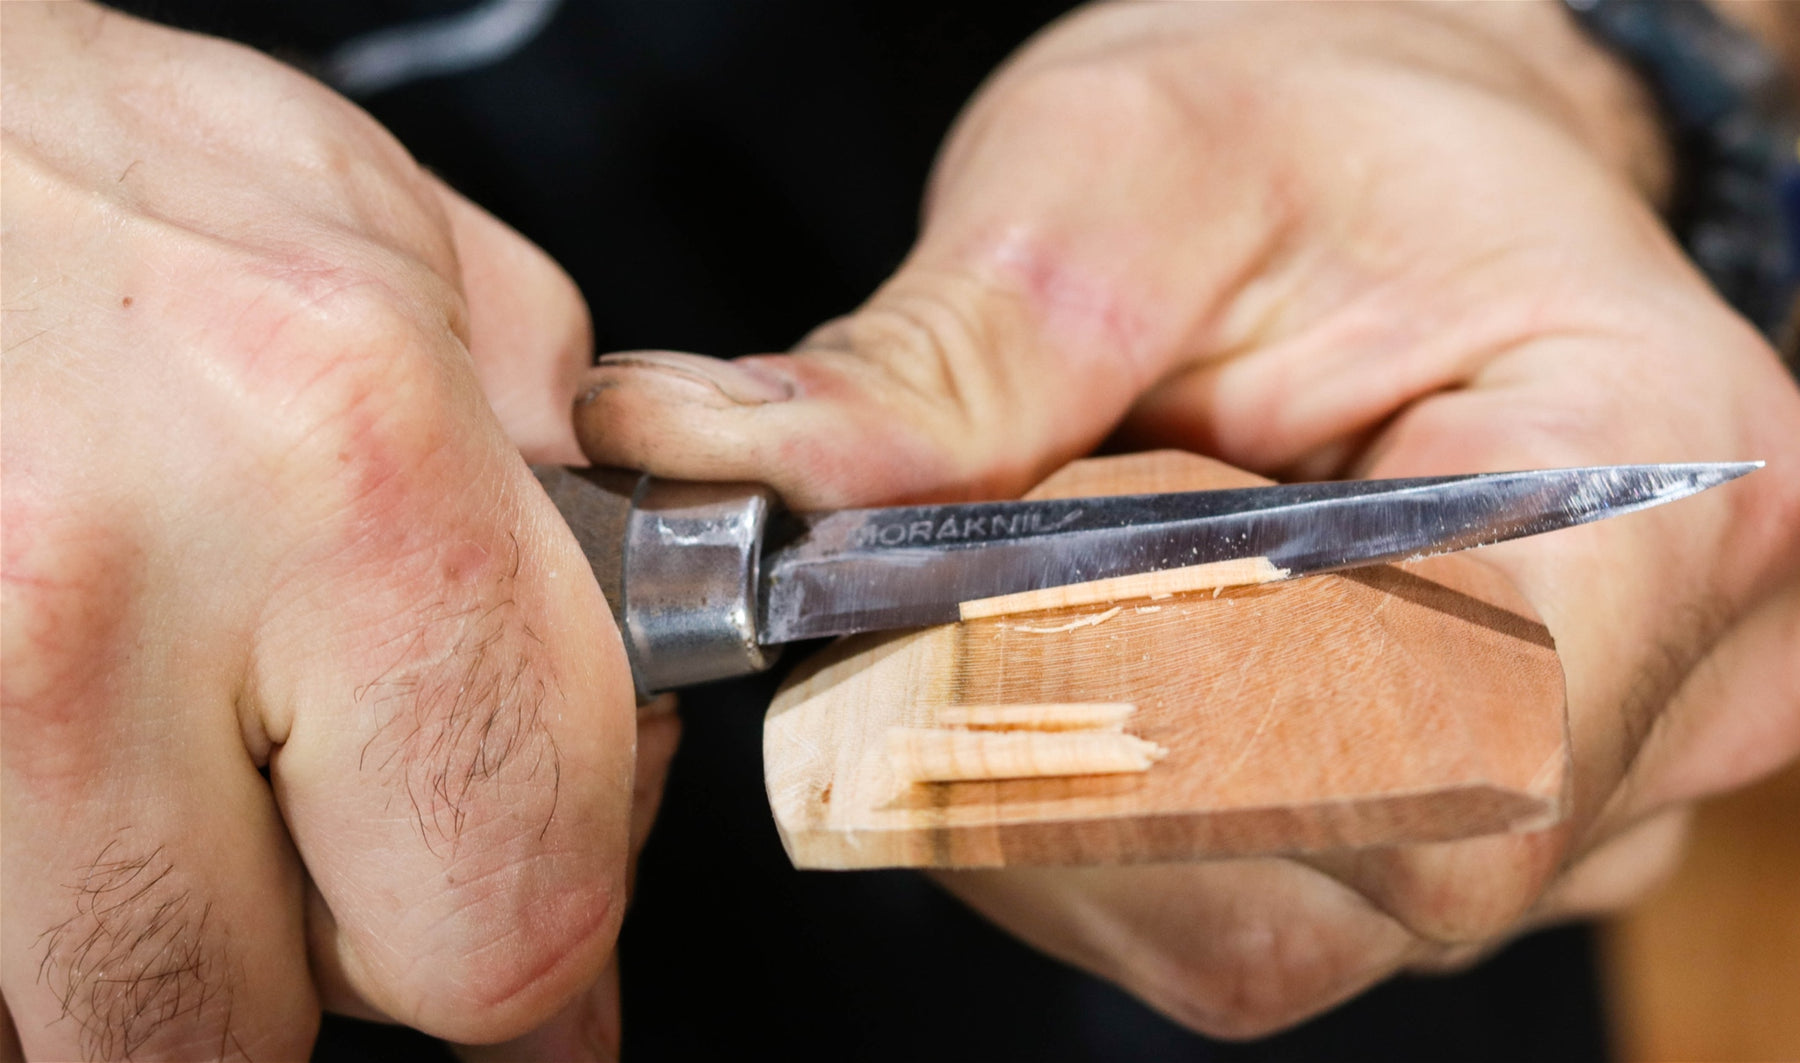
I like to sharpen with the edge trailing, mainly because that’s how you strop and I’ve built up muscle memory for moving my tools that way. Today’s goal is to remove the chip. The wide bevels of the Scandi grind make it relatively easy to lay flat on the stone. Since the edge of a sloyd knife is curved you have to ever-so-slightly lift the handle in order to properly sharpen all the way to the tip. I don’t feel the need to sharpen the entire length of the bevel with each pass. I might make three passes to hit the whole length. One pass for the part closest to the handle, one of the middle and the third concentrating on the tip. You can often tell what section of the tool is getting sharpened from the black residue it leaves on the stone.

A bad habit of many carvers is to switch to a finer grit too soon. I continued using the coarse 500 grit until the chip was gone. Now I’ve got an undamaged knife, but the 500 grit leaves too raggedy an edge for fine carving. So I have to work my way through the grits: 1000, 3000, 5000 and 8000. My goal with the 500 grit was to remove the chip, so I had a clear metric for when to progress to the 1000 grit stone. Knowing when to move up the grits from 1000 to 3000 and so on is a matter of raising a burr. Concentrate on sharpening just one bevel, pause every few passes to feel for a raised burr on the unsharpened bevel. Do this by gently passing your fingernail off the bevel. As your nail leaves the edge it should catch on the burr. When this happens you can move to the other bevel and repeat the process. With the finer grits, moving from 5000 to 8000 for example, you might not be able to feel the burr. For these grits I rely on the scratch pattern left by the stones. Once the 5000 grit has removed all the deeper scratches from the 3000 grit I move to the final 8000 grit stone. From 3000 grit you could go straight to stropping. As I rely on stropping to keep my edges in good condition, if I’ve gone to the effort of getting messy with stones I like to do a thorough job of it.

After the 8000 grit I like to strop. I do this on a 12" XL Leather Bench Mountable Strop with Green Honing compound. The honing compound is the abrasive, while the leather provides a soft material that conforms around the edge. This puts a convex micro bevel on the edge. This helps keep the edge sharp for longer. Again I rely on checking scratch patterns as my cue for when I’m done stropping.

Once the knife is fully sharp I need to wash my hands. Putting these grubby mitts on an almost finished wood project will leave dirty marks. Since the ‘dirt’ is actually steel dust, covering my project with it is a quick way to dull my fresh edge. With clean hands and finely honed edge, I can now get back to carving!